Water Heater Leaking From Bottom? Causes & Fixes
Water leaking from the bottom of your water heater? Learn common causes, simple troubleshooting checks, and when you need a plumber.

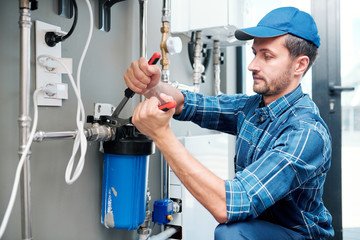
Why Is My Water Heater Leaking From the Bottom?
Discovering a pool of water beneath your water heater is a common plumbing headache. Whether it is a slow trickle dampening the floor or an active flood spreading across your basement, a bottom leak demands prompt attention.
A water heater leaking from the bottom does not always mean you need an expensive unit replacement. The leak could stem from a simple loose drain valve or a venting Temperature and Pressure (T&P) relief valve.
However, if the leak originates from an internal tank crack caused by age and corrosion, immediate action is required to prevent major water damage to your home.
First 5 Minutes: What to Do Immediately
If you see water pooling around the base of your water heater, follow these steps to limit water damage and isolate the system:
-
Shut Off the Power / Fuel Source
-
Electric Units: Switch off the water heater breaker at your main electrical panel immediately. Never work around standing water while the unit is energized.
-
Gas Units: Rotate the gas valve knob on the front of the heater to "OFF" or "PILOT."
-
-
Turn Off the Cold Water Supply
-
Locate the cold water shutoff valve on the pipe feeding into the top of the heater. Turn the lever 90 degrees (for ball valves) or clockwise (for gate valves) to stop pressurized water from filling the tank.
-
-
Contain the Standing Water
-
Use buckets, towels, or a wet/dry shop vacuum to absorb pooled water before it seeps into subfloors, baseboards, or nearby drywall.
-
-
Do NOT Drain the Tank Hot
-
Wait for the water inside to cool before opening any drain valves, or run hot water at a nearby sink faucet to relieve pressure safely.
-
-
Call an Experienced Local Plumber
-
If water continues flowing after the supply valve is closed, or if the tank itself has ruptured, contact an emergency plumbing service right away.
-
Common Causes of Bottom Water Heater Leaks
Understanding where the water originates helps distinguish a quick DIY valve repair from a complete tank failure.
                   ┌── Loose / Plastic Drain Valve ──► Replace Valve or Cap
                   │
Bottom Water Leak ─┼── T&P Relief Valve Discharge ──► High Pressure / Temperature
                   │
                   └── Internal Tank Seam Failure ───► Total Unit Replacement
1. Faulty or Loose Drain Valve
Located near the base of the tank, the drain valve is used to drain sediment during routine maintenance.
-
The Problem: Older plastic factory drain valves become brittle over time, and brass valves can fail to seal tightly due to mineral sediment caught in the valve seat.
-
Signs: Water is dripping directly from the threaded outlet spigot of the drain valve or around its threads.
2. Temperature and Pressure (T&P) Relief Valve Discharge
The T&P valve is a mandatory safety device located near the top or side of the tank, with a discharge pipe extending down toward the floor.
-
The Problem: If water temperature or pressure inside the tank exceeds safe thresholds (typically 150 PSI or 210°F), the valve opens to vent water. The discharged water runs down the overflow pipe and collects around the bottom of the heater.
-
Signs: Water is dripping or running directly out of the open end of the discharge pipe near the floor.
3. Ruptured Inner Steel Tank (Corrosion)
Standard water heaters consist of a steel inner tank surrounded by insulation and an outer metal jacket.
-
The Problem: Over years of operation, hard water minerals and corrosive elements wear down the internal glass lining and sacrificial anode rod. Once rust eats through the steel inner wall, water leaks into the insulation layer and drains out through the bottom seams of the outer jacket.
-
Signs: Water trickles continuously out from under the bottom jacket rim, and there are no signs of leaks from upper fittings, valves, or pipes.
4. Thermal Expansion & Excess System Pressure
In homes with closed plumbing systems (such as those with check valves or pressure-reducing valves), heated water expands but has nowhere to go.
-
The Problem: Uncontrolled thermal expansion spikes internal tank pressure, causing water to weep past the T&P relief valve seal or stress internal tank welds.
5. Excessive Condensation (Cold Weather)
During winter, when ice-cold ground water enters a completely drained or newly installed tank, heavy condensation forms on the cold outer tank surface.
-
The Problem: Droplets collect and drip down into the burner pan, creating the appearance of a leak at the base.
-
Signs: The dripping stops once the tank warms up and reaches its normal operating temperature.
Is It a Valve Leak or a Ruptured Tank?
| Feature | Leaking Drain/T&P Valve | Ruptured Inner Tank |
| Water Source | Visible drip coming from valve spigot or discharge pipe. | Water pooling under the bottom outer rim with no valve dripping. |
| Repair Option | Replace valve, tighten connections, or add expansion tank. | Tank cannot be repaired; complete unit replacement required. |
| Leak Rate | Usually slow dripping or intermittent venting. | Steady, continuous flow that increases under water pressure. |
| Typical Tank Age | Any age (often maintenance-related). | Usually 8 to 12+ years old. |
Safe Homeowner Checks vs. Professional Work
Distinguishing between minor fixes and complex repairs keeps your home safe and prevents accidental damage.
What You Can Safely Check
-
Inspect Upper Fittings: Ensure water is not leaking from top supply flex lines or cold inlet valves and dripping down the sides, making it look like a bottom leak.
-
Tighten the Drain Valve: If water drips from the drain valve spigot, check if the valve handwheel is turned completely clockwise. A garden hose cap with a rubber washer can be screwed onto a dripping hose thread as a temporary fix.
-
Check T&P Valve Clearance: Verify that the T&P relief discharge pipe is clear and unclogged.
What Requires a Professional Plumber
-
Replacing a Failed Inner Tank: Installing a replacement water heater involves structural connections, electrical wiring, gas pipe testing, and code compliance.
-
Replacing a Corroded Brass Drain Valve: Threading out a stuck drain valve from a sediment-heavy tank requires draining and careful handling to avoid stripping tank threads.
-
Resolving High Water Pressure or Thermal Expansion: Installing a pressure-reducing valve (PRV) or thermal expansion tank requires professional sizing and pipe fitting.
Local Plumbing Considerations in Hermon, ME
Properties in Hermon and surrounding Penobscot County experience local conditions that accelerate water heater wear:
-
Hard Water & Mineral Scale: Mineral-dense well water prevalent in central Maine causes calcium sediment to settle at the bottom of tanks. This sediment layer causes localized overheating, cracking the inner glass lining and accelerating corrosion at the bottom seam.
-
Cold Ground Water Temperatures: Extremely cold winter water increases thermal stress on steel tanks during long heating cycles.
-
Unfinished Basements: Many local heaters sit on concrete basement floors without drain pans. A sudden tank rupture in these spaces can lead to unnoticed standing water that damages foundation walls and personal storage.
What a Plumber Will Do to Fix the Leak
When a technician arrives at your home to evaluate a bottom leak, they perform a methodical diagnosis:
-
Locate the True Origin: Isolating top fittings, T&P discharge pipes, and lower drain valves to rule out superficial leaks.
-
Pressure & Thermal Testing: Measuring static incoming water pressure and evaluating thermal expansion behavior.
-
Internal Tank Assessment: Checking for rust weep holes along the bottom jacket or inside the burner chamber (on gas units).
-
Targeted Repair or Tank Replacement:
-
For Valve Issues: Flushing sediment, replacing bad T&P or drain valves, or adjusting thermal expansion tanks.
-
For Tank Ruptures: Safely draining the unit, disconnecting electrical/gas connections and flue vents, hauling away the failed tank, and installing a new energy-efficient system up to current local codes.
-
Cost Factors in Water Heater Repairs
Plumbing repair costs vary depending on the severity of the problem, accessibility, materials required, emergency service, property type, and local labor rates.
Primary Drivers of Expenses
-
Simple Valve Repair vs. Full Unit Replacement: Replacing a drain valve or T&P valve is a straightforward repair; replacing an entire tank involves new equipment, disposal, and comprehensive installation labor.
-
Type of System: Replacing a standard 40- or 50-gallon tank is generally simpler than converting to a tankless water heater or hybrid heat pump system.
-
Code Upgrades & Accessories: Installing a code-required thermal expansion tank, discharge pipe extension, or safety drain pan adds material and labor costs.
-
Emergency Service Timing: Service calls dispatched late at night, on weekends, or during holidays include off-hours dispatch fees.
10 Common Mistakes to Avoid
-
Assuming all bottom leaks mean the tank is ruined: Replacing a tank when only a $20 drain valve was leaking.
-
Ignoring a steadily dripping T&P discharge pipe: Allowing dangerous internal pressure or overheating to go unchecked.
-
Plugging or capping a T&P relief discharge pipe: Disabling a critical safety relief mechanism, creating an explosion risk.
-
Leaving power on to an electric water heater while shut off: Burning out heating elements when water levels drop.
-
Failing to use a safety drain pan under the heater: Leaving basement floors unprotected against future tank breaches.
-
Cranking up tank temperature to fix pressure issues: Increasing thermal expansion stress and scalding risks.
-
Neglecting annual tank flushes: Allowing mineral scale to build up and corrode the tank bottom.
-
Never replacing the sacrificial anode rod: Allowing rust to attack the steel tank lining unchecked.
-
Attempting gas line or high-voltage electrical work DIY: Creating severe fire or gas safety hazards.
-
Delaying action on a slow leak: Letting a minor drip evolve into a full tank failure that floods living areas.
Preventive Maintenance Tips
-
Flush Sediment Annually: Drain several gallons of water from the bottom valve every year to clear out mineral scale.
-
Test the T&P Relief Valve: Lift the valve lever once a year to ensure it opens smoothly and resets completely without sticking.
-
Inspect the Anode Rod Every 3 Years: Replace the anode rod when it becomes thin or heavily corroded to extend tank life.
-
Install a Thermal Expansion Tank: Protect your water heater from pressure spikes caused by closed municipal or well systems.
-
Use a Safety Drain Pan: Place a corrosion-proof drain pan under your water heater connected to a drain line or leak alarm.
Internal Linking Suggestions
-
Water Heater Repair & Replacement Services: Link to your primary water heater service landing page.
-
Emergency Plumbing Response: Link to your 24/7 emergency service page for active leak assistance.
-
Leak Detection & Repair: Link to general leak location services for hidden pipe inspections.
-
Preventive Plumbing Maintenance: Link to annual maintenance plans covering tank flushes and valve checks.
Image Suggestions
-
Inspecting a Water Heater Drain Valve Leak
-
Placement: Under the "Common Causes of Bottom Water Heater Leaks" section.
-
Image Description: A close-up shot of a technician checking a brass drain valve at the base of a water heater with water droplets visible on the hose threads.
-
Alt Text: Plumber inspecting a dripping drain valve at the base of a residential water heater.
-
-
Temperature and Pressure (T&P) Relief Discharge Pipe
-
Placement: Next to the "Is It a Valve Leak or a Ruptured Tank?" comparison table.
-
Image Description: A clear view of a copper T&P discharge pipe running down the side of a water heater toward a floor drain pan.
-
Alt Text: Water heater T&P relief valve discharge pipe ending above a basement floor drain.
-
-
Replacing an Old Water Heater Tank
-
Placement: Inside the "What a Plumber Will Do to Fix the Leak" section.
-
Image Description: A professional plumber installing a new, energy-efficient water heater tank with new flex connectors and an expansion tank.
-
Alt Text: Professional plumber installing a modern water heater tank with an expansion tank.
-
Frequently Asked Questions
Can a leaking water heater be repaired, or does it always have to be replaced?
If the leak comes from a threaded drain valve, top fitting, or T&P relief valve, it can usually be repaired. If the leak originates from a crack in the internal steel tank itself, the unit cannot be repaired and must be replaced.
Why is water dripping from the pipe on the side of my water heater?
That pipe is the T&P relief discharge pipe. Water dripping from it indicates that internal tank temperature or pressure is too high, or that the valve itself has failed and needs replacement.
How long can I wait to replace a water heater leaking from the bottom?
You should address it immediately. A bottom leak caused by internal corrosion can turn from a minor drip into a sudden, catastrophic breach that releases dozens of gallons of water continuously.
What causes a water heater tank to rust through at the bottom?
Hard water minerals settle at the bottom of the tank, creating a sediment layer that traps heat and accelerates corrosion. Once the sacrificial anode rod is exhausted, rust eats through the steel inner wall.
Is it normal for a new water heater to leak from the bottom during its first heating cycle?
Heavy condensation can form on the outside of a new tank filled with cold water during its first heating cycle. This condensation drops to the floor, mimicking a leak, but stops once the water reaches operating temperature.
How do I know if the leak is coming from the top or bottom?
Inspect the top flex lines, cold inlet valve, and temperature controls first. Water from a top leak often flows down behind the outer insulation and pools at the bottom, making it appear like a bottom leak.
Will turning off the main water valve stop my water heater from leaking?
Turning off the cold water inlet valve stops new pressurized water from entering the tank. However, water already inside the 40- to 80-gallon tank will continue to leak out until the unit is drained.
Why is my water heater drain valve leaking after I flushed it?
Sediment particles often get trapped in the rubber washer or valve seat when draining the tank, preventing a tight seal. Opening and closing the valve briefly can clear the debris, or a thread cap can be added as a temporary fix.
What is a thermal expansion tank, and do I need one?
A thermal expansion tank absorbs the extra water volume created when water heats up in a closed plumbing system. Without one, thermal expansion increases system pressure, triggering T&P valve leaks.