How to Fix a Leaking Pipe Under Kitchen Sink | Tims Plumbing HVAC
Discover how to spot, temporarily fix, and permanently repair a leaking pipe under your kitchen sink in Milwaukee, WI. Expert guidance from Tims Plumbing HVAC.
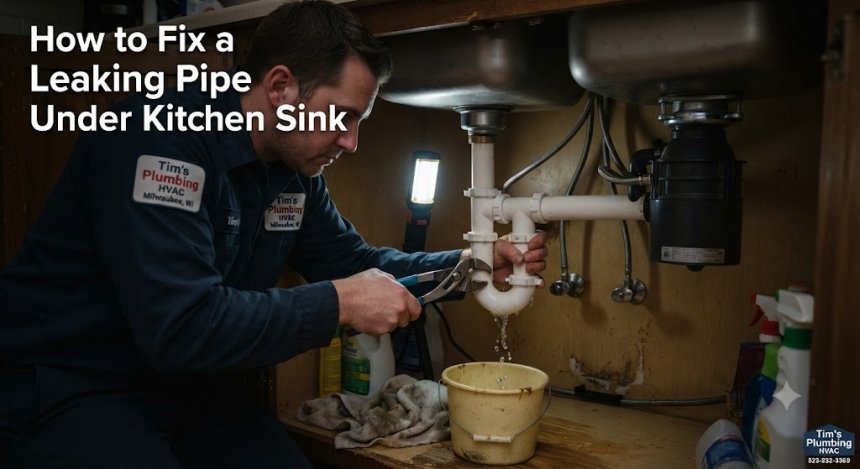
Discovering a puddle inside your kitchen cabinet can instantly cause panic. Whether you live in a historic home in Milwaukee's Bay View neighborhood or a newer build in Wauwatosa, a leaking pipe under the kitchen sink is one of the most common household plumbing issues. Because we rely on our kitchen sinks daily for cooking, cleaning, and meal prep, even a slow drip can quickly saturate cabinet wood, promote mold growth, and rack up water damage.
At Tims Plumbing HVAC, we help homeowners across Milwaukee, Brookfield, Greenfield, and surrounding Milwaukee County communities tackle these exact plumbing headaches. Understanding why these leaks happen, how to manage them temporarily, and when to call a licensed professional helps protect your home from costly structural damage.
What Is a Kitchen Sink Drain Leak?
A kitchen sink leak typically refers to water escaping from the supply lines (hot or cold water shut-off valves) or the drainage assembly (including the tailpiece, slip joints, P-trap, and strainer basket) beneath the basin.
-
Definition: A localized failure of pipe seals, gaskets, or threaded connections allowing wastewater or pressurized supply water to escape into the under-sink cabinet.
-
Common Situations: You notice a damp musty smell when opening cabinet doors, find warped particle board flooring, or see active drips when the faucet is running or the basin is draining.
-
Symptoms: Puddles, mineral crust buildup on PVC nuts, stained cabinet bases, and occasional low drainage speed.
For instance, if you notice water pooling only when you empty a full basin of dishwater, the issue usually points to a loose or cracked P-trap assembly. If the puddle is present constantly, a supply line or the faucet base is likely the culprit.
Why Does This Plumbing Problem Happen?
Sink leaks rarely occur without a cause. Understanding the root mechanical or environmental failure helps prevent future headaches.
-
Worn Plumbing Fixtures & Gaskets: Rubber washers and slip-joint washers inside the P-trap dry out, crack, or flatten over time, losing their waterproof seal.
-
Loose Connections: Heavy storage items shifting around inside the cabinet can easily bump against PVC pipes and loosen slip-joint nuts.
-
Corrosion: Older metal tailpieces and threaded brass fittings corrode from years of exposure to moisture and harsh chemical drain cleaners.
-
Hard Water Mineral Buildup: Milwaukee water carries mineral content that can accumulate inside connections, warping seals and forcing joints apart.
-
Improper Installation: Hand-tightened fittings that were never properly torqued, or mismatched PVC and ABS pipe components, frequently fail under thermal expansion.
-
Excessive Strain: Forcing a garbage disposal or straining heavy pots against rigid drain pipes puts mechanical stress on wall connections.
Hidden Truths Homeowners Should Know
Plumbing systems operate under constant physical forces, meaning minor neglect quickly snowballs into major property damage.
Expert Insight: Small, persistent drips are far more destructive over time than sudden bursts because they go unnoticed for weeks, rotting cabinet substrates and subflooring before anyone acts.
-
Cheap Temporary Fixes Fail: Wrapping duct tape or electrical tape around a pressurized or actively draining pipe is a recipe for disaster; pressure will always find a way out.
-
Mold Develops Rapidly: Dark, enclosed spaces under sinks combined with constant moisture create a breeding ground for mold within 24 to 48 hours.
-
Hard Water Wrecks Seals: Local hard water deposits degrade rubber o-rings much faster than soft water systems.
-
DIY Mistakes Multiply Costs: Cross-threading a PVC slip nut or over-tightening plastic fittings strips the threads entirely, turning a $5 gasket replacement into an entire pipe assembly replacement.
-
Delaying Leads to Structural Rot: Plywood cabinet bottoms absorb water like a sponge, swelling, delaminating, and requiring full cabinet replacement.
Signs You Should Never Ignore
Catching early warning signs under your sink prevents minor maintenance from turning into an emergency plumbing call.
-
Musty or Earthy Odors: A persistent damp smell when opening the cabinet usually points to hidden moisture trapped behind plumbing lines.
-
Water Stains or Discoloration: White, chalky mineral rings or dark water rings on the floor of the cabinet indicate chronic minor splashing or leaking.
-
Warped or Soft Cabinet Floor: If the wood feels spongy when pressed, water has been leaking long enough to compromise the material.
-
Sudden Spike in Water Bills: If supply lines are leaking silently against the cabinet back wall, your municipal water utility bill will reflect the waste.
-
Sluggish Drainage: Slow draining combined with small moisture beads often signals a partial clog placing backpressure on pipe joints.
Can You Fix It Yourself?
Many under-sink leaks are minor enough for a confident homeowner to handle safely, provided you know your limits.
-
Safe DIY Steps: Place a bucket underneath, unscrew the slip-joint nuts by hand, inspect the rubber washer inside, clean out any built-up hair or debris inside the P-trap, and reassemble securely (hand-tight, plus a quarter turn with pliers).
-
When DIY Becomes Dangerous: If your leak originates from behind the wall, involves corroded galvanized iron supply lines, or requires soldering copper pipes, stop immediately.
-
When a Professional Is Necessary: If you strip PVC threads, encounter constant leaks despite replacing gaskets, or suspect sewage gas is escaping into your Milwaukee home, it is time to bring in licensed experts.
Step-by-Step Professional Repair Process
When you call Tims Plumbing HVAC for a kitchen sink issue, our technicians follow a systematic approach to ensure lasting results.
-
Step 1: Inspection & Water Shut-Off: We examine the entire assembly and shut off the local supply or refrain from running water to ensure a dry workspace.
-
Step 2: Comprehensive Diagnosis: We trace the water path using moisture meters and visual checks to determine if the leak is isolated to the trap or extending into the wall stub-out.
-
Step 3: Upfront Estimate: We present clear, honest pricing for the required repairs before touching a single tool.
-
Step 4: Precision Repair or Replacement: We remove damaged components, replace worn washers, and install code-compliant PVC or brass piping.
-
Step 5: Pressure & Flow Testing: We run high-volume water tests through both basins to verify zero leakage under active drainage conditions.
-
Step 6: Thorough Cleanup: We wipe down the work area and leave your cabinet cleaner than we found it.
-
Step 7: Maintenance Guidance: We share custom tips on how to load your under-sink storage safely without bumping the new piping.
Common Plumbing Problems Related to This Issue
A leaking sink pipe rarely exists in isolation. Homeowners often encounter correlated plumbing challenges:
-
Drain Clogs: Accumulated grease, food scraps, and soap scum slow drainage, increasing pressure on slip-joint seals.
-
Corroded Shut-Off Valves: Old multi-turn valves often leak from the packing nut when turned off during a repair.
-
Garbage Disposal Leaks: Vibrations from failing disposal internal bearings frequently crack the lower discharge tube.
-
Water Heater Issues: Older water heaters feeding the kitchen can produce sediment that clogs aerators and strains supply lines.
-
Supply Line Bursts: Aged braided stainless steel or braided plastic supply hoses can rupture under sudden pressure spikes.
Tools Professionals Use
Licensed plumbers utilize specialized diagnostic and repair tools to solve leaks efficiently and accurately.
-
Basin Wrenches: Designed with long shafts and pivoting jaws to reach tight mounting nuts behind deep kitchen sinks.
-
Pipe Inspection Cameras: Used to check the health of vertical drain lines and wall stub-outs.
-
Leak Detection Meters: Digital moisture meters that identify hidden moisture behind drywall and cabinets.
-
Precision Tubing Cutters: Ensure clean, burr-free cuts on copper or PVC replacement piping.
-
Professional Grade Sealants: Plumber's putty and thread seal tape rated for potable water and drainage systems.
How Long Does the Repair Usually Take?
Repair timelines depend entirely on the complexity of the underlying failure.
-
Simple Slip-Joint Gasket Replacement: 30 to 45 minutes.
-
Full P-Trap and Tailpiece Assembly Replacement: 1 hour.
-
Supply Valve and Line Replacement: 1 to 2 hours.
-
Complex Repairs (Behind-Wall Drain Repair): 2 to 4 hours.
-
Factors Affecting Time: Accessibility inside cramped custom cabinets, corrosion severity, and whether matching parts need to be sourced for older historic fixtures.
Cost Factors
Plumbing repair costs vary depending on the severity of the problem, accessibility, materials required, emergency service, property type, and local labor rates.
-
Diagnostic Fees: Standard service call fees to assess the issue and travel to your Milwaukee location.
-
Parts & Materials: Standard PVC fittings cost less than specialized brass or designer P-trap finishes.
-
Labor Rates: Standard hourly or flat-rate pricing structures versus emergency after-hours dispatch rates.
-
Accessibility: Extra time required to empty heavily cluttered storage cabinets or work around custom farmhouse sink plumbing configurations.
15 Common Mistakes Homeowners Make
-
Using Chemical Drain Cleaners: Harsh lye-based chemicals eat away at older metal pipe walls and degrade rubber seals.
-
Over-Tightening Slip Nuts: Twisting plastic PVC nuts too tightly with heavy wrenches warps washers and strips threads.
-
Ignoring Small Dips: Assuming a minor drip will dry out on its own.
-
Storing Heavy Chemicals Under Sinks: Cleaners and heavy detergent jugs shift and bash against vulnerable drainage lines.
-
Using Duct Tape for Repairs: Applying temporary adhesive tapes to pressurized lines.
-
Mixing Pipe Materials Incorrectly: Mismatched PVC and ABS glues leading to joint separation.
-
Hiring Unlicensed Handymen: Risking improper code compliance and uninsured property damage.
-
Skipping Regular Cabinet Inspections: Never opening the under-sink storage to look for moisture.
-
Forcing Garbage Disposals: Overloading disposals with fibrous waste, creating backpressure.
-
Failing to Replace Washers: Re-using brittle, compressed rubber gaskets during reassembly.
-
Leaving Old Supply Hoses Too Long: Braided lines kinking and wearing out against cabinet walls.
-
Ignoring Water Pressure Issues: High municipal water pressure straining under-sink connections.
-
Pouring Grease Down Drains: Solidifying fats that choke drainage lines.
-
Waiting Until Emergencies Strike: Delaying maintenance until a pipe completely gives way.
-
Neglecting Shut-Off Valve Maintenance: Never testing whether local water valves actually close.
Maintenance Tips
Protect your kitchen plumbing investment with these practical, everyday routines.
-
Inspect Monthly: Shine a flashlight under your sink once a month to check for early dampness or mineral scaling.
-
Organize Smartly: Keep heavy cleaning bottles away from delicate PVC drain elbows to prevent accidental impacts.
-
Flush with Hot Water: Weekly, run boiling water down the drain to melt away lingering grease buildup.
-
Avoid Harsh Chemicals: Use mesh sink strainers to catch food particles instead of chemical openers.
-
Exercise Shut-Off Valves: Turn your supply valves off and on twice a year to keep the internal mechanisms from seizing up.
-
Clear Storage Clutter: Ensure airflow under the cabinet to prevent humidity buildup.
-
Monitor Water Pressure: Install a pressure reducing valve if your home experiences pressure above 80 PSI.
-
Replace Hoses Proactively: Swap out flexible supply lines every 5 to 7 years.
-
Check Disposal Mounts: Ensure your garbage disposal mounting ring remains tight and vibration-free.
-
Professional Tune-Ups: Schedule annual plumbing inspections with Tims Plumbing HVAC to catch wear items early.
When Should You Call an Emergency Plumber?
Certain situations require immediate, professional intervention to prevent catastrophic property loss.
-
Burst Supply Pipes: When a hot or cold supply line snaps, flooding your kitchen floor rapidly.
-
Major Drainage Collapses: When sewage or gray water backs up directly out of the kitchen sink basin.
-
Uncontrollable Leaks: When shut-off valves fail to stop water flow into the cabinet.
-
Structural Flooding: Water pooling across kitchen hardwood or subflooring.
Frequently Asked Questions
-
Why is my water pressure suddenly low? Mineral scaling in your faucet aerator or a partially closed supply valve typically restricts water flow.
-
How much does leak detection cost? Costs vary depending on whether the leak is surface-level or hidden behind walls, requiring electronic acoustic detection.
-
Can a clogged drain damage pipes? Yes, standing water and constant backpressure stress slip-joint seals and weaken older pipe walls.
-
Is hydro jetting safe for old pipes? Professional plumbers evaluate pipe integrity first; high-pressure jetting is usually reserved for robust main sewer lines rather than fragile under-sink PVC.
-
How do I know if my sewer line is broken? Multiple slow drains, gurgling toilets, and sewage odors throughout the house point to a main line issue.
-
How long do water heaters last? Standard tank water heaters typically last between 8 to 12 years with proper maintenance.
-
Why does my faucet drip? Worn-out cartridges, ceramic discs, or internal O-rings are the primary culprits behind persistent faucet drips.
-
What causes pipes to burst? Freezing winter temperatures and extreme internal water pressure spikes are the leading causes of ruptured pipes.