How to Fix a Running Toilet: Expert Guide | Tims Plumbing
Learn why your toilet keeps running after flushing, how to troubleshoot temporary DIY fixes, and when to call Tims Plumbing in Milwaukee.
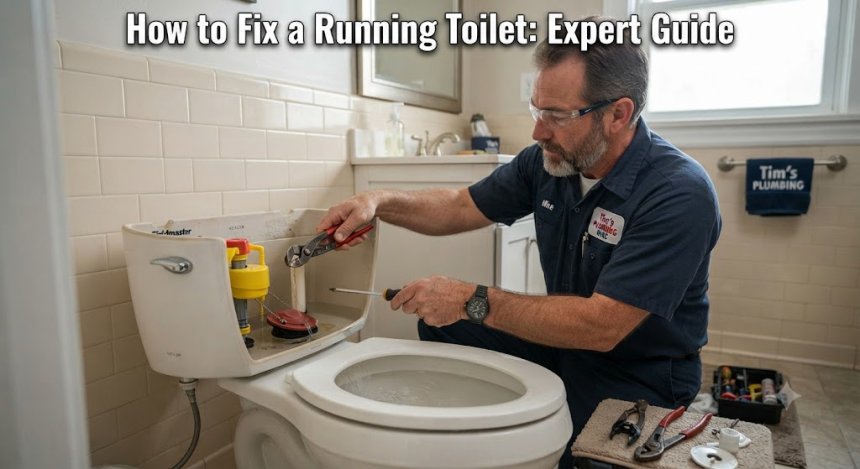
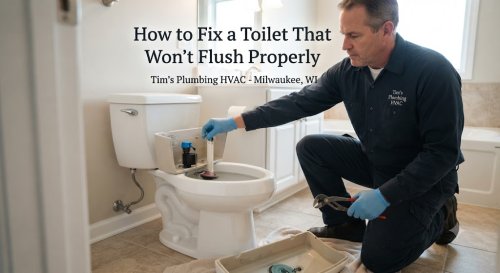
Standing in your bathroom and listening to the endless sound of water trickling into the bowl is more than just an annoyance—it is a clear sign of waste. A running toilet is a common household plumbing issue where water continuously drains from the tank into the bowl long after the flush cycle has completed. Homeowners across Milwaukee, WI, from the historic homes along the Historic Third Ward to newer constructions in Brookfield and Wauwatosa, frequently encounter this frustrating problem. It usually happens due to worn-out internal components, improper float adjustments, or mineral buildup from hard water. Giving immediate attention to a running toilet is important because a minor internal leak can waste hundreds of gallons of water a day, driving up utility bills and putting unnecessary strain on your municipal sewer or septic system. Homeowners search for this topic because a constantly running mechanism is loud, expensive, and wastes precious natural resources. When basic jiggling of the handle fails, understanding the mechanical root cause helps you determine whether a simple part swap will suffice or if it is time to call a professional team like Tims Plumbing HVAC for expert service.
What Is a Running Toilet?
A running toilet is defined by a continuous flow of water from the toilet tank into the bowl without the handle being pressed. This malfunction disrupts the standard water-holding and gravity-flush design of modern gravity-feed toilets.
-
Common situations: You flush the toilet, but the water inside the tank never stops filling, or water trickles continuously down the interior walls of the ceramic bowl long after the cycle finishes.
-
Symptoms: A hissing or rushing sound of water, a tank that takes an unusually long time to fill, or the fill valve cycling on and off periodically throughout the day and night without user interaction.
-
Examples: Water spilling directly into the vertical overflow tube because the water level is set too high, or a warped rubber flapper failing to create a watertight seal over the flush valve drain hole at the bottom of the tank.
Why Does This Plumbing Problem Happen?
Toilet mechanisms rely on a precise balance of buoyancy, water pressure, and rubber seals. Over time, physical wear and environmental factors degrade these components.
-
Worn plumbing fixtures: Rubber flappers degrade, warp, or become brittle over time due to continuous exposure to water and cleaning chemicals inside the tank.
-
Hard water: Milwaukee municipal water contains minerals like calcium and magnesium. These minerals form crusty scale deposits on the flush valve seat and fill valve seals, preventing proper closure.
-
Improper installation: If the chain connecting the flush handle to the flapper is adjusted too tightly, it leaves the flapper slightly open. If it is too loose, it gets caught beneath the seal.
-
Aging pipes and internal assemblies: Plastic fill valves, float balls, and metal linkages wear out after years of constant mechanical movement.
-
High water pressure: Excessive incoming municipal water pressure can overpower standard fill valve shut-off seals, forcing water past the valve and causing the tank to overfill.
Signs You Should Never Ignore
While a running toilet seems like a minor inconvenience, it often signals wider plumbing or efficiency issues that deserve immediate attention.
-
High water bills: A silently running toilet can waste up to 200 gallons of water a day, resulting in an unexpectedly massive municipal utility bill.
-
Strange noises: Constant hissing or sporadic refilling indicates that mechanical components are failing and straining your home plumbing infrastructure.
-
Damp walls or flooring near the base: If a running toilet is paired with a faulty wax ring or tank-to-bowl gasket leak, water can seep onto your bathroom subfloor, causing wood rot and structural damage.
-
Discolored water or mineral buildup: Heavy scaling around plumbing fixtures indicates aggressive water chemistry that will soon impact other home appliances like water heaters and dishwashers.
Common Plumbing Problems Related to This Issue
A running toilet rarely occurs in a vacuum and is frequently connected to broader plumbing vulnerabilities throughout a property.
-
Fixture damage: Continuous water flow accelerates wear on internal tank bolts, gaskets, and supply line connections.
-
Water heater failures: If a toilet runs continuously with hot water (due to an improper supply line hookup, though rare), it forces the water heater to run constantly.
-
Drain clogs: A sluggish or partial clog further down the waste line combined with an over-running toilet can sometimes lead to localized bowl overflows.
-
Slab leaks and hidden pipe stress: Chronic water pressure fluctuations caused by faulty fill valves put extra stress on old residential supply piping.
Step-by-Step Professional Repair Process
When you call licensed professionals like Tims Plumbing HVAC to service your plumbing system, they follow a systematic approach to ensure lasting results.
-
Step 1: Inspection: The technician evaluates the entire toilet assembly, checking the condition of the tank, bowl, supply line, and surrounding flooring.
-
Step 2: Diagnosis: The plumber tests the fill valve, measures tank water levels, inspects the flapper seal, and checks for mineral scale accumulation.
-
Step 3: Estimate: You receive a clear, upfront pricing overview detailing the required parts and labor before any actual repair work starts.
-
Step 4: Repair: The technician shuts off the water supply, drains the tank, and replaces worn components such as the fill valve, flapper, flush valve assembly, or tank-to-bowl gasket.
-
Step 5: Testing: Multiple test flushes are performed to verify proper water shut-off, correct tank water levels, and leak-free operation.
-
Step 6: Cleanup: The work area is thoroughly cleaned, and old, discarded parts are removed from your bathroom.
-
Step 7: Maintenance Advice: The plumber provides custom tips on how to prevent future toilet malfunctions and maintain your bathroom fixtures.
Can You Fix It Yourself?
Many minor toilet issues can be handled safely as a DIY weekend project, but knowing your limits prevents property damage.
-
Safe DIY solutions: Replacing a worn rubber flapper, adjusting a tangled or loose flapper chain, or bending a float arm downward to lower the water level.
-
Temporary fixes: Shutting off the wall supply valve behind the toilet when not in use to stop water waste until replacement parts can be purchased.
-
When DIY becomes dangerous: Attempting to force-tighten rusted or corroded floor bolts and supply lines can crack the porcelain toilet bowl or snap ancient metal supply pipes, causing sudden indoor flooding.
-
When professional plumbing is necessary: If replacing the flapper and fill valve does not stop the running, or if there are cracks in the porcelain tank, hidden leaks beneath the floor, or persistent high water pressure issues, call a licensed plumber.
Tools Professionals Use
Professional plumbers rely on specialized diagnostic and repair tools to solve plumbing challenges quickly and accurately.
-
Leak detection equipment: Electronic listening devices and thermal cameras to identify hidden leaks behind walls or beneath flooring.
-
Pressure testing gauges: Devices used to measure residential water pressure and determine if a pressure-reducing valve is required.
-
Pipe locators and inspection cameras: Used during complex bathroom remodels or severe diagnostic calls to inspect internal waste lines.
-
Hand tools and specialty wrenches: Basin wrenches and socket sets designed specifically to reach tight spaces beneath bathroom sinks and behind toilets.
How Long Does the Repair Usually Take?
The duration of a plumbing repair depends directly on the root cause and the complexity of the internal mechanisms.
-
Simple repairs: Replacing a toilet flapper or adjusting a fill valve chain typically takes 15 to 30 minutes.
-
Moderate repairs: Replacing an entire fill valve and flush valve assembly usually takes 45 to 60 minutes.
-
Major repairs: Re-securing a loose toilet flange, replacing a damaged wax ring, or repairing subfloor damage takes 2 to 4 hours.
-
Emergency repairs: Responding to an overflowing or severely leaking fixture takes immediate priority, with on-site resolution typically completed within 1 to 2 hours.
Cost Factors
Understanding what influences plumbing service pricing helps homeowners plan their budgets effectively.
-
Diagnostic fees: The cost for a licensed professional to travel to your home, inspect the plumbing issue, and provide an expert diagnosis.
-
Parts: The quality and type of replacement components required, such as universal flappers versus proprietary manufacturer flush assemblies.
-
Labor: The time and specialized expertise required to complete the repair correctly.
-
Emergency service charges: Fees associated with after-hours, weekend, or holiday dispatch calls.
-
Accessibility of pipes: Difficulty in accessing shut-off valves or supply lines in tight, enclosed bathroom spaces.
Plumbing repair costs vary depending on the severity of the problem, accessibility, materials required, emergency service, property type, and local labor rates.
Hidden Truths Homeowners Should Know
Plumbing systems operate largely out of sight, meaning small issues can compound into major expenses if ignored.
-
Small leaks become expensive repairs: A minor trickle wastes thousands of gallons over weeks, dramatically inflating water utility bills.
-
Cheap temporary fixes often fail: Using duct tape or silicone on moving tank parts provides a false sense of security and almost always leads to sudden failure.
-
Insurance may not cover neglected plumbing: Homeowners insurance policies frequently deny claims resulting from water damage caused by long-term, neglected slow leaks.
-
Hard water shortens fixture lifespan: Unfiltered hard water deposits scale inside valves and pipes, causing premature component breakdown.
-
DIY mistakes increase repair costs: Forcing corroded components can crack porcelain fixtures, turning a minor flapper replacement into a full toilet replacement project.
-
Delaying repairs causes structural damage: Water tracking along subfloors breeds mold and rots wooden joists.
-
Annual maintenance saves money: Routine plumbing check-ups catch failing seals before they flood your bathroom.
15 Common Mistakes Homeowners Make
Avoiding common pitfalls protects your plumbing system and saves you money on unnecessary service calls.
-
Ignoring minor running sounds until the utility bill arrives.
-
Using harsh chemical drain cleaners inside toilet tanks, which rapidly dissolves rubber seals.
-
Flushing non-flushable wipes, paper towels, and hygiene products that trap debris against internal flush valves.
-
Pouring grease or cooking oil down bathroom sinks connected to shared waste lines.
-
Ignoring high water pressure problems that continuously stress toilet fill valves.
-
Hiring unlicensed, uninsured handymen for complex plumbing work.
-
Skipping routine annual bathroom plumbing inspections.
-
Waiting until an active emergency occurs before establishing a relationship with a local plumber.
-
Using incorrect pipe materials or mismatched replacement parts during DIY repairs.
-
Over-tightening porcelain tank bolts and flange nuts, which causes catastrophic cracking.
-
Leaving water supply valves half-open, causing whistling and premature valve wear.
-
Forcing warped handles that bend internal metal lift wires.
-
Neglecting to shut off the main water supply when performing minor bathroom upgrades.
-
Using unverified universal replacement parts that do not match specific toilet models.
-
Assuming old toilets will run forever without requiring component overhauls.
Maintenance Tips
Proactively caring for your bathroom plumbing extends the lifespan of your fixtures and prevents unexpected failures.
-
Inspect the inside of your toilet tank twice a year for signs of mineral buildup, rust, or degrading rubber parts.
-
Clean mineral scale off the flush valve seat using a non-abrasive brush and white vinegar.
-
Replace rubber toilet flappers every 3 to 5 years as part of routine home maintenance.
-
Avoid dropping chemical drop-in bleach tablets into the tank, as they degrade plastic and rubber components prematurely.
-
Test your toilet shut-off valve annually by turning it off and on to ensure it does not seize up.
-
Keep the area around the toilet base dry to immediately spot any hidden leaks from the wax ring.
-
Monitor your monthly water utility bill for sudden, unexplained increases in consumption.
-
Educate all household members on what items are safe to flush down the toilet.
-
Consider installing a whole-home water softener if you live in the Milwaukee area to combat hard water scale.
-
Check the flush handle chain tension seasonally to ensure it has about 1/2 inch of slack.
-
Listen for unusual hissing sounds after the tank finishes filling.
-
Replace old brass tank bolts with corrosion-resistant stainless steel or brass hardware.
-
Test the home water pressure periodically to ensure it stays below standard safety thresholds.
-
Schedule a professional plumbing inspection when purchasing or selling an older home in Wisconsin.
-
Address sluggish flushes immediately before they turn into complete clogs or overflows.
When Should You Call an Emergency Plumber?
Certain plumbing situations require immediate professional intervention to protect your property from extensive water damage.
-
Overflowing toilet: Water spilling continuously onto the bathroom floor that cannot be stopped by closing the local supply valve.
-
Burst supply lines: A cracked or ruptured braided stainless steel water supply hose spraying water under pressure.
-
Sewage backup: Wastewater bubbling up into your bathtub, shower, or toilet bowl from the main sewer line.
-
No running water: Complete loss of water pressure to all fixtures in the home during freezing winter weather.
-
Flooding: Standing water accumulating across bathroom and hallway flooring due to severe supply or drain failures.
Frequently Asked Questions
-
Why is my water pressure suddenly low? Sudden low water pressure is typically caused by a failing pressure-reducing valve, a partially closed main shut-off valve, mineral buildup in aerators, or a hidden supply pipe leak.
-
How much does leak detection cost? Leak detection costs vary based on the complexity of the property and the diagnostic technology required, such as acoustic listening equipment or thermal imaging cameras.
-
Can a clogged drain damage pipes? Yes. Severe clogs create intense internal pressure when water backs up, which can stress weak joints and lead to pipe leaks or bursts.
-
Is hydro jetting safe for old pipes? Hydro jetting requires an initial professional camera inspection; if pipes are structurally compromised, traditional snaking or sectional replacement may be recommended instead.
-
How do I know if my sewer line is broken? Warning signs include multiple slow drains throughout the house, foul odors in the yard, gurgling toilets, and soggy patches on your lawn.
-
How long do water heaters last? Standard tank water heaters typically last between 8 to 12 years, while tankless models can last 20 years or more with regular flushing.
-
Why does my faucet drip? A dripping faucet is usually caused by a worn-out O-ring, washer, or cartridge inside the valve assembly that fails to create a proper seal.
-
What causes pipes to burst? Pipes most commonly burst when water inside them freezes and expands during sub-freezing winter weather, or due to severe structural corrosion and high water pressure.
-
Can plumbing leaks increase my water bill? Even a small hidden leak can waste thousands of gallons of water per month, leading to a surprisingly high municipal utility bill.