How to Fix a Leaking Bathroom Faucet | Tims Plumbing
Learn how to fix a leaking bathroom faucet with expert tips from Tims Plumbing HVAC. Step-by-step guidance for Milwaukee homeowners.

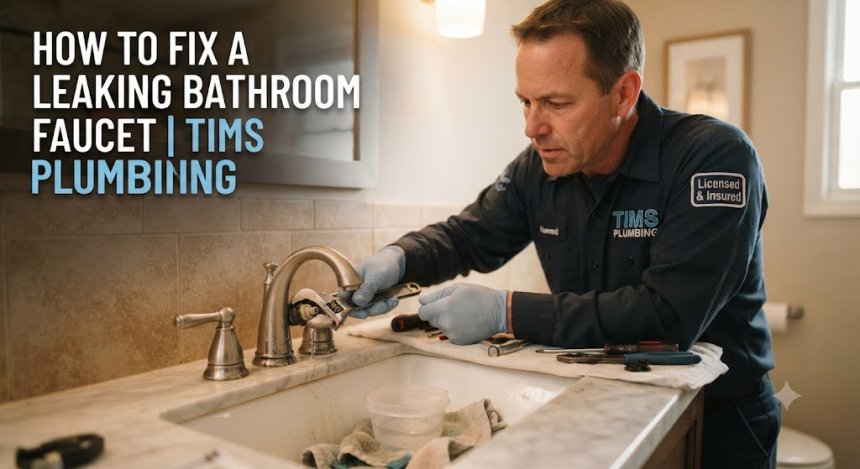
That steady, rhythmic drip echoing through your quiet home late at night is more than just an annoying sound; it is a direct drain on your wallet and a sign of underlying mechanical wear. Homeowners frequently encounter a leaking bathroom faucet due to daily friction, mineral buildup, and natural material fatigue. Ignoring this seemingly minor issue often leads to warped cabinetry, mold growth, and startlingly high municipal water bills. For residents living in Milwaukee, aging municipal infrastructure and harsh seasonal shifts create a unique environment where plumbing components degrade faster. Understanding how to diagnose and address a dripping spout before it turns into a major disaster is vital for protecting your property.
What Is a Leaking Bathroom Faucet? Decoding the Mechanism
A bathroom faucet is a precision assembly designed to control water flow and temperature by mixing hot and cold lines through a central valve body. When you turn a handle, internal components—such as rubber washers, ceramic discs, or O-rings—create a tight, waterproof seal against water pressure. When this seal fails due to friction, sediment accumulation, or age, water forces its way past the barrier, escaping continuously through the spout or leaking underneath around the mounting base.
Consider a typical Milwaukee colonial home built in the 1960s. Over decades of service, the brass valve seats inside an older two-handle widespread sink become pitted. Even when the handle is cranked shut, a small gap remains, resulting in a persistent leak that wastes gallons of treated water daily.
Root Causes: Why This Problem Occurs in Milwaukee Homes
Plumbing fixtures in the Midwest face specific environmental and structural stressors that accelerate wear and tear.
-
Hard Water Mineral Scaling: Milwaukee draws its water supply from Lake Michigan, which carries moderate mineral content. Over time, calcium and magnesium deposits crystallize on internal cartridges and aerators, preventing tight seals.
-
Municipal Water Pressure Fluctuations: City pressure spikes during off-peak hours can stress older valve assemblies, weakening rubber gaskets prematurely.
-
Aging Infrastructure & Historic Piping: Many homes in neighborhoods like Shorewood or Bay View feature older supply lines and vintage fixtures that have long exceeded their expected manufacturing lifespans.
-
Seasonal Thermal Expansion: Extreme temperature swings between bitter winters and humid summers cause metal pipes and internal plastic components to expand and contract rapidly, warping delicate seals.
-
Daily Mechanical Friction: High-traffic guest or children's bathrooms experience excessive force on handles, accelerating the degradation of internal stems and springs.
Critical Warning Signs: When Your Home is Sounding the Alarm
Failing fixtures rarely fail in isolation; they usually provide warning signs before catastrophic failure occurs.
-
Auditory Clues: Listen for faint hissing, water hammering when closing valves, or a persistent drip that changes pitch as the valve seat wears down.
-
Olfactory Indicators: A musty, damp earth smell under the sink indicates that moisture has breached the cabinet floor, encouraging mold and mildew proliferation.
-
Visual Evidence: Mineral crust accumulation (white or green powdery buildup) around the base of the handles, rust stains in the basin, or a sudden, unexplained spike in your quarterly water bill.
-
Structural Cascading Risks: Prolonged leaks saturate subflooring and vanity wood, causing rotting, structural sagging, and expensive carpentry remediation.
Professional Diagnostic & Repair Workflow
Licensed, insured plumbers follow a strict, systematic methodology to resolve faucet issues without causing collateral damage to your bathroom finishes.
-
Step 1: Non-Invasive Triage & Safety Isolation: Locate and close the dedicated hot and cold angle stops underneath the sink to cut off water supply safely.
-
Step 2: Precision Diagnostic & Component Inspection: Disassemble the handle assembly, escutcheon plate, and cartridge or stem to identify exact wear patterns.
-
Step 3: Transparent, Upfront Options & Written Estimating: Present the homeowner with clear choices between rebuilding the existing unit with OEM parts or installing a complete modern fixture replacement.
-
Step 4: Code-Compliant Remediation & Part Replacement: Clean valve seats, apply food-grade silicone grease, and install replacement cartridges or washers matching local plumbing codes.
-
Step 5: Pressure Testing, Flow Verification, & Clean: Reopen water supplies, test under maximum pressure, check for hidden under-sink leaks, and sanitize the work area.
Advanced Diagnostics: The Professional Tool Arsenal
When a faucet leak stems from hidden supply line issues behind the wall or underneath the slab, professionals rely on advanced technology.
-
Digital Manometers: Measure static and dynamic water pressure to determine if a failing Pressure Reducing Valve (PRV) is destroying your fixtures.
-
Acoustic Leak Detectors: Pinpoint hidden pipe fractures behind bathroom tiles without unnecessary demolition.
-
High-Definition Inspection Cameras: Threaded down drain assemblies to check waste arm integrity and ensure the sink tailpiece is completely leak-free.
-
Precision Extraction Tools: Specialized socket wrenches and seat dressers designed to remove stripped, calcified nuts in tight, recessed vanity spaces.
DIY Reality Check: What You Can Safely Fix vs. When to Step Back
Homeowners can successfully handle minor maintenance, but knowing your limits prevents costly mishaps.
-
Safe Homeowner Actions: Replacing a clogged aerator, tightening a loose handle screw, or swapping out a standard drop-in supply line gasket.
-
The Danger Zone: Forcing rusted compression nuts, stripping old angle stops, or overtightening ceramic cartridges, which can crack porcelain basins or twist copper supply pipes inside the wall.
-
When to Call a Pro: If your angle stops fail to shut off completely, if the mounting hardware is completely corroded to the porcelain, or if water is leaking behind the wall cavity, drop the wrench and call a licensed professional immediately.
Financial Breakdown: Cost Factors & Investment Realities
Plumbing repair investments depend on several variable labor and material inputs.
-
Service Dispatch & Diagnostics: Standard diagnostic fees cover the technician's travel, professional assessment, and upfront pricing guarantees.
-
Repair vs. Replacement Parts: Simple washer replacements cost significantly less than replacing a high-end designer cartridge or an entire widespread faucet assembly.
-
Accessibility Challenges: Tight working spaces in custom vanities or vintage pedestal sinks require extra labor time to safely access connections.
-
Associated Upgrades: Replacing old, corroded quarter-turn shutoff valves alongside the faucet ensures long-term system reliability.
Unique Expert Insights: Hard Truths Homeowners Learn Too Late
-
Temporary patch kits using epoxy or rubber tape only mask deeper system failures and can void home insurance coverage if they rupture while you are away.
-
Chemical liquid drain cleaners and drop-in tank tablets accelerate metal corrosion, eating through brass valve seats and inner faucet walls from the inside out.
-
Unlicensed handymen often bypass municipal code requirements regarding backflow prevention and proper air gaps, creating hidden liabilities during future real estate sales.
-
Preventative maintenance plans and annual whole-home plumbing inspections cost a fraction of a single emergency midnight flood extraction.
-
Matching replacement parts matters; generic big-box store cartridges rarely fit tightly in proprietary high-end designer fixtures, leading to premature repeat leaks.
Comprehensive Home Plumbing Maintenance Framework
-
Spring Checks: Test all under-sink shutoff valves to ensure they turn smoothly; inspect supply lines for signs of bulging or fraying.
-
Summer Habits: Clean mineral buildup from faucet aerators by soaking them in a vinegar solution to maintain proper water flow and pressure.
-
Fall Preparation: Check bathroom exhaust fans to ensure proper humidity removal, preventing moisture accumulation around fixtures and cabinetry.
-
Winter Readiness: Maintain consistent indoor temperatures during deep freezes to prevent vulnerable supply lines running through exterior walls from freezing.
-
Year-Round Habits: Never force faucet handles past their natural stopping point; teach family members to operate levers gently to preserve internal seals.
Emergency Protocol: When Immediate Dispatch is Non-Negotiable
-
Catastrophic Supply Line Rupture: If an under-sink supply line completely detaches, immediately close the main home water shutoff valve and call for emergency dispatch.
-
Active Ceiling Leaks: If a bathroom faucet leak is pouring water through the ceiling into the room directly below, shut off water mains instantly.
-
Electrical Hazards: If water from a leaking fixture begins pooling near electrical outlets, baseboard heaters, or power strips, cut power at the breaker panel.
-
Complete Drainage Failure: When a leaking fixture coincides with a totally blocked waste line threatening living areas with gray water backup.
Frequently Asked Questions (FAQs)
Why is my bathroom faucet leaking from the base of the spout?
This typically indicates a worn-out O-ring or seal inside the swivel spout or a loose mounting nut underneath the sink deck. Replacing the O-rings or tightening the mounting hardware usually resolves the issue.
Can hard water in Milwaukee ruin a brand-new faucet?
Yes. Mineral scaling accelerates wear on ceramic discs and rubber seals. Installing a whole-home water softener or regularly cleaning aerators significantly extends your faucet's lifespan.
Should I repair an old faucet or replace it entirely?
If the faucet is more than 10 to 15 years old, finding exact replacement parts can be difficult. In these cases, investing in a modern, water-efficient replacement is often more cost-effective than continuous repairs.
Is it normal for a faucet to drip after turning it off?
A momentary drip (one or two drops) as water drains from the spout is normal. However, a continuous, steady drip means the internal valve is failing to create a complete seal.
How do I find my main water shutoff valve in an emergency?
In most Milwaukee homes, the main water shutoff valve is located in the basement or utility room near the front foundation wall where the municipal water line enters the house.
Can a leaking bathroom faucet cause high water bills?
A surprisingly large amount of water is wasted by a slow drip—sometimes hundreds of gallons per month—which directly increases your municipal utility bill.
What tools do I need to fix a single-handle faucet leak?
You typically need a set of Allen wrenches (hex keys), an adjustable wrench, channel-lock pliers, plumber's grease, and a replacement cartridge specific to your faucet brand.
How long does a professional bathroom faucet replacement take?
A standard faucet replacement by a licensed plumber usually takes between one to two hours, depending on the accessibility of the under-sink connections.